
Contact Titan Outdoor Solutions
Ready to extend your outdoor living space? Let's talk about what's possible for your home.
How Can We Help You?
Whether you're ready to schedule a free design consultation, have questions about our products, or need support with an existing installation—we're here for you.
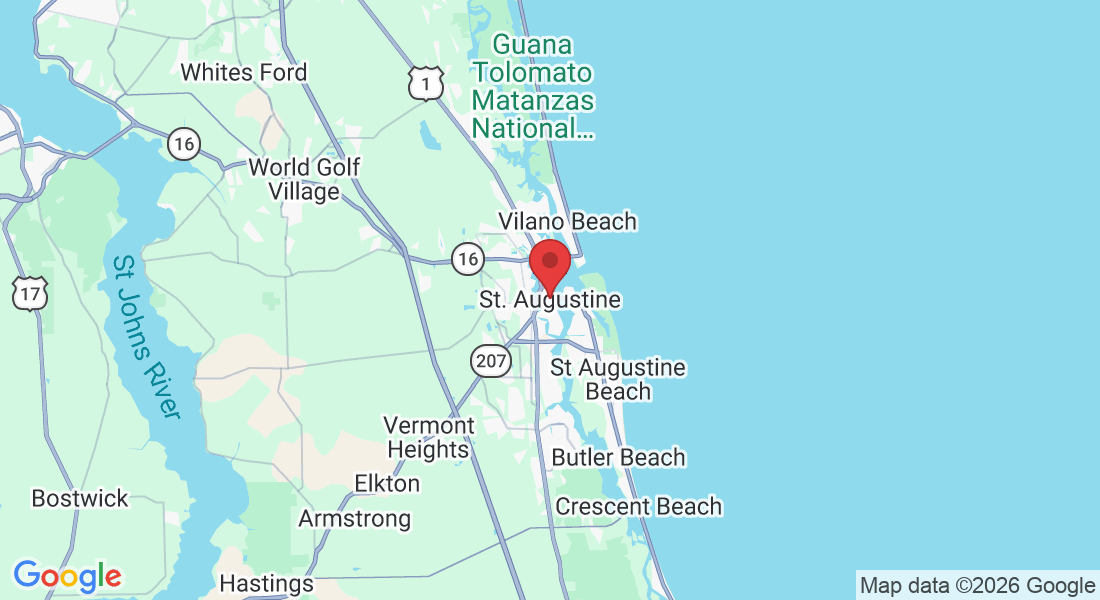
Address:
3515 Agricultural Center Drive
St. Augustine, FL 32092
Phone:
(904) 484-7580
Email:
Hours:
Monday - Friday: 8:00 AM - 5:00 PM
Saturday: By Appointment
Sunday: Closed
How Can We Help You?
Whether you're ready to schedule a free design consultation, have questions about our products, or need support with an existing installation—we're here for you.
Address:
3515 Agricultural Center Drive
St. Augustine, FL 32092
Phone:
(904) 484-7580
Email:
Hours:
Monday - Friday: 8:00 AM - 5:00 PM
Saturday: By Appointment
Sunday: Closed
Our Service Areas
We proudly serve homeowners throughout Northeast Florida's most beautiful communities.
Ready to transform your
outdoor living?
Quality craftsmanship. Year-round comfort. Stress-free process.
Stay Informed
Per the StoryBrand framework — a clear, simple plan (3-4 steps max) reduces decision anxiety.

The Paver Installation Your Neighbor Regrets: Drainage Failures, Base Shortcuts, and the Mistakes That Surface in Year Two
Your neighbor's paver patio looked stunning the day it was finished. You stood on your side of the fence and watched the crew sweep the final layer of sand into the joints, hose the surface clean, and drive away in a truck that still had the company logo on the door. The result was undeniably beautiful. Warm-toned pavers in a herringbone pattern, clean edges, a surface that looked like it belonged in a design magazine. Your neighbor posted the photos that evening. The comments were generous. The envy was real.
Eleven months later, you noticed something through the fence slats. A dip near the center of the patio where the pavers had settled into a shallow depression. Water pooling after a rainstorm in a spot that should have drained toward the yard. A few pavers along the border that had shifted outward, leaving a gap where the edge used to be clean. And one corner where the joint sand had washed out completely, leaving open seams that weeds had already found.
Your neighbor's paver installation did not fail because pavers are unreliable. Pavers, properly installed, outlast every other residential outdoor surface by a wide margin. The installation failed because something beneath the surface was not done correctly. And that something was invisible on day one, invisible for the first several months, and now visible in ways that will cost more to fix than it would have cost to do right the first time.
This is the story of paver installation problems, and it is far more common than the industry would like to admit.
Explore the complete outdoor living ecosystem at NextGen Screens
Why Every Paver Job Looks Great on Day One
The surface layer of a paver installation is the easiest part of the job. The pavers themselves are manufactured to precise dimensions, uniform in thickness, consistent in color, and designed to interlock in patterns that are visually stunning regardless of the skill level of the person laying them. A crew with minimal experience can produce a surface that photographs beautifully on completion day. The pavers are new. The joints are clean. The polymeric sand is freshly activated. Everything looks sharp.
This is why evaluating paver installation quality based on the finished appearance is one of the most common mistakes homeowners make. The appearance on day one tells you almost nothing about how the installation will perform on day three hundred. The paver surface is a veneer. What determines the longevity, stability, drainage, and structural integrity of the installation is everything beneath that veneer; the base material, the compaction, the grading, the edge restraints, and the jointing system. None of these elements are visible once the pavers are laid.
The question is not whether the pavers look good. The question is whether the system beneath them was built to the specification that allows them to stay looking good. And that question cannot be answered by looking at photographs.
Learn about engineered outdoor systems at Onetrack Screens
The Base Nobody Sees, and Why It Matters More Than the Surface
The paver base depth requirements for a residential patio installation typically call for a minimum of four to six inches of compacted gravel aggregate beneath a one-inch leveling layer of coarse sand. In areas with poor soil drainage, heavy clay, or freeze-thaw exposure, the required base depth increases to eight inches or more. This is the foundation that distributes load, manages water, and absorbs the seasonal ground movement that would crack a rigid concrete surface.
When a paver contractor cuts the base depth from six inches to three, the savings in material and labor are significant. The excavation is shallower, the gravel volume is halved, the compaction time is reduced, and the job is finished faster. On the invoice, the homeowner sees the same number of pavers, the same pattern, the same finished surface. What they do not see is that the foundation beneath it is half as thick as it needs to be.
The consequences of an insufficient base reveal themselves gradually. The first sign is usually localized settling, a small area where the pavers sink slightly below the surrounding surface. This happens because the thin base layer lacks the depth to distribute concentrated loads, and the soil beneath compresses unevenly. The settling creates a low point where water collects. Standing water saturates the base material further, which accelerates the settling. The cycle compounds.
Why are my pavers sinking after one year? The answer, in the overwhelming majority of cases, is insufficient base depth, inadequate compaction, or both.
See how proper surfaces support motorized screen systems at Maxforce Screens
Drainage: The Invisible Enemy of Every Outdoor Surface
Paver drainage issues are the single most common source of long-term installation failure, and they are almost entirely attributable to improper grading during the base preparation phase. Water is relentless, patient, and completely indifferent to how much you paid for your patio. If the surface grade does not direct water away from the home and toward designated drainage paths, the water will find its own path. And the path water finds on its own is always destructive.
Proper drainage grading for a paver patio requires a minimum slope of one percent, which translates to roughly one-eighth of an inch per foot of run, directed away from the home's foundation. This grade must be established at the excavated subgrade level, maintained through the compacted gravel base, and preserved through the screeded sand layer. If the grade is established on the surface pavers but not on the layers beneath, the water that infiltrates through the joints, and it always infiltrates, will pool on the subgrade and saturate the base from below.
The contractor who establishes grade only at the surface is building a paver installation that looks like it drains but does not. The water moves off the top but collects underneath. The saturated base loses its load-bearing capacity. The pavers settle. And the homeowner, who sees a surface that appeared to drain properly, cannot understand why the installation is failing.
How to tell if paver installation was done right begins with a simple test after the first heavy rain. Walk the entire surface. If water is pooling anywhere, if there are wet spots that take hours to dry, if the edges are damp while the center is dry or vice versa, the drainage grade is not performing. And if the drainage grade is not performing in year one, it will only get worse.
Discover how engineered outdoor solutions work together at NextGen Screens
Edge Restraints, Polymeric Sand, and the Details That Separate Decades from Years
There are two details in every paver installation that homeowners almost never ask about and that low-cost contractors almost always cut. The first is edge restraint. The second is polymeric sand. Together, they account for perhaps five percent of the total project cost. And together, their absence accounts for the majority of paver installation problems that surface in the first two to three years.
Edge restraints are structural borders, typically aluminum, plastic, or concrete, installed along the perimeter of the paver field and anchored to the base with spikes driven through the restraint and into the compacted gravel. Their function is to prevent lateral movement of the pavers at the edges of the installation. Without edge restraints, the pavers along the perimeter are free to shift outward over time, which opens joints, disrupts the interlock pattern, and creates gaps that allow sand washout, weed infiltration, and further structural loosening.
Polymeric sand is a jointing compound applied between the pavers and activated with water to create a firm, flexible joint that resists weed growth, insect infiltration, and rain washout. Standard joint sand, by contrast, is loose granular material that washes out with the first heavy rain and must be replenished seasonally. The contractor who uses standard sand instead of polymeric sand saves a few hundred dollars. The homeowner who lives with standard sand spends every spring re-sanding joints and pulling weeds from gaps that should never have been open.
How long do pavers last? With proper base depth, correct drainage grade, quality edge restraints, and polymeric sand, the answer is twenty-five years or more with minimal maintenance. Without those elements, the answer is three to five years before visible deterioration begins to require attention and investment.
The details that separate decades from years are not expensive. They are just easy to skip.
See the complete outdoor living protection options at Onetrack Screens
The Contractor Conversation You Need to Have Before Signing
The most important conversation in the paver installation process is not the one about color, pattern, or design. It is the one about what happens beneath the surface. And it is a conversation that the homeowner must initiate, because the contractor who cuts corners will never raise these topics voluntarily.
Ask about base depth. The answer should be specific; six inches minimum for a patio, eight to twelve for a driveway. If the answer is vague, move on. Ask about compaction. The answer should include plate compaction in lifts, not a single pass over the full depth. If the contractor does not own or rent a plate compactor, that is a disqualifying signal. Ask about drainage grade. The answer should include a specific slope percentage and a drainage direction. If the answer is "water runs off naturally," the contractor does not understand grading.
Ask about edge restraints. The answer should specify the material and the anchoring method. If the answer is "we use the existing border" or "we just set the edge pavers in concrete," the contractor is improvising. Ask about joint sand. The answer should be polymeric, not standard. If the contractor hesitates on this question, they are planning to use standard sand and hoping you do not know the difference.
These are not aggressive questions. They are basic competency questions. The contractor who answers them confidently, specifically, and without defensiveness is the contractor who understands that the invisible work beneath the surface is what makes the visible surface last. The contractor who deflects, generalizes, or becomes uncomfortable is telling you exactly how they plan to build your patio.
Paver settling fix projects are almost always more expensive than doing the job correctly in the first place. The base must be re-excavated, the pavers must be removed and relaid, and the grading must be corrected from the subgrade up. The homeowner pays twice; once for the original installation and once for the repair. The informed homeowner pays once, because they asked the right questions before signing.
Explore the full resource library at NextGen Screens
Building a Surface That Deserves What Sits on Top of It
The paver installation is not the end of the outdoor living story. It is the beginning. The surface you are building today is the floor of the outdoor room you will continue to build tomorrow and the season after that and the year after that. The pergola posts will anchor to it. The motorized screen tracks will reference its grade. The outdoor furniture will sit on its surface. The fire pit will rest on its base. Every element of the outdoor living space that makes your backyard worth spending time in depends on the integrity of the surface beneath it.
A paver installation that was done right is invisible in the best possible way. You do not think about it. You do not notice it. You walk on it, you set furniture on it, you host on it, and it simply works, season after season, year after year. A paver installation that was done wrong is impossible to ignore. The settling, the pooling, the shifting, the weeds; each one is a daily reminder that the foundation was not given the attention it deserved.
The surface your outdoor room stands on should be as thoughtfully engineered as the structure above it. The contractor who understands this builds a surface that lasts. The contractor who does not builds a surface that photographs well and deteriorates quietly.
If you are ready to explore what a properly engineered paver installation looks like for your property, or if you want to understand how the surface beneath your feet connects to the pergola, the screens, and the complete outdoor living system above it, the resources are waiting.
Start exploring the complete outdoor living ecosystem at NextGen Screens
Discover Onetrack's motorized screen systems at Onetrack Screens
Learn about hurricane-rated protection with Maxforce Screens

Stay Informed
Per the StoryBrand framework — a clear, simple plan (3-4 steps max) reduces decision anxiety.
The Paver Installation Your Neighbor Regrets: Drainage Failures, Base Shortcuts, and the Mistakes That Surface in Year Two
Your neighbor's paver patio looked stunning the day it was finished. You stood on your side of the fence and watched the crew sweep the final layer of sand into the joints, hose the surface clean, and drive away in a truck that still had the company logo on the door. The result was undeniably beautiful. Warm-toned pavers in a herringbone pattern, clean edges, a surface that looked like it belonged in a design magazine. Your neighbor posted the photos that evening. The comments were generous. The envy was real.
Eleven months later, you noticed something through the fence slats. A dip near the center of the patio where the pavers had settled into a shallow depression. Water pooling after a rainstorm in a spot that should have drained toward the yard. A few pavers along the border that had shifted outward, leaving a gap where the edge used to be clean. And one corner where the joint sand had washed out completely, leaving open seams that weeds had already found.
Your neighbor's paver installation did not fail because pavers are unreliable. Pavers, properly installed, outlast every other residential outdoor surface by a wide margin. The installation failed because something beneath the surface was not done correctly. And that something was invisible on day one, invisible for the first several months, and now visible in ways that will cost more to fix than it would have cost to do right the first time.
This is the story of paver installation problems, and it is far more common than the industry would like to admit.
Explore the complete outdoor living ecosystem at NextGen Screens
Why Every Paver Job Looks Great on Day One
The surface layer of a paver installation is the easiest part of the job. The pavers themselves are manufactured to precise dimensions, uniform in thickness, consistent in color, and designed to interlock in patterns that are visually stunning regardless of the skill level of the person laying them. A crew with minimal experience can produce a surface that photographs beautifully on completion day. The pavers are new. The joints are clean. The polymeric sand is freshly activated. Everything looks sharp.
This is why evaluating paver installation quality based on the finished appearance is one of the most common mistakes homeowners make. The appearance on day one tells you almost nothing about how the installation will perform on day three hundred. The paver surface is a veneer. What determines the longevity, stability, drainage, and structural integrity of the installation is everything beneath that veneer; the base material, the compaction, the grading, the edge restraints, and the jointing system. None of these elements are visible once the pavers are laid.
The question is not whether the pavers look good. The question is whether the system beneath them was built to the specification that allows them to stay looking good. And that question cannot be answered by looking at photographs.
Learn about engineered outdoor systems at Onetrack Screens
The Base Nobody Sees, and Why It Matters More Than the Surface
The paver base depth requirements for a residential patio installation typically call for a minimum of four to six inches of compacted gravel aggregate beneath a one-inch leveling layer of coarse sand. In areas with poor soil drainage, heavy clay, or freeze-thaw exposure, the required base depth increases to eight inches or more. This is the foundation that distributes load, manages water, and absorbs the seasonal ground movement that would crack a rigid concrete surface.
When a paver contractor cuts the base depth from six inches to three, the savings in material and labor are significant. The excavation is shallower, the gravel volume is halved, the compaction time is reduced, and the job is finished faster. On the invoice, the homeowner sees the same number of pavers, the same pattern, the same finished surface. What they do not see is that the foundation beneath it is half as thick as it needs to be.
The consequences of an insufficient base reveal themselves gradually. The first sign is usually localized settling, a small area where the pavers sink slightly below the surrounding surface. This happens because the thin base layer lacks the depth to distribute concentrated loads, and the soil beneath compresses unevenly. The settling creates a low point where water collects. Standing water saturates the base material further, which accelerates the settling. The cycle compounds.
Why are my pavers sinking after one year? The answer, in the overwhelming majority of cases, is insufficient base depth, inadequate compaction, or both.
See how proper surfaces support motorized screen systems at Maxforce Screens
Drainage: The Invisible Enemy of Every Outdoor Surface
Paver drainage issues are the single most common source of long-term installation failure, and they are almost entirely attributable to improper grading during the base preparation phase. Water is relentless, patient, and completely indifferent to how much you paid for your patio. If the surface grade does not direct water away from the home and toward designated drainage paths, the water will find its own path. And the path water finds on its own is always destructive.
Proper drainage grading for a paver patio requires a minimum slope of one percent, which translates to roughly one-eighth of an inch per foot of run, directed away from the home's foundation. This grade must be established at the excavated subgrade level, maintained through the compacted gravel base, and preserved through the screeded sand layer. If the grade is established on the surface pavers but not on the layers beneath, the water that infiltrates through the joints, and it always infiltrates, will pool on the subgrade and saturate the base from below.
The contractor who establishes grade only at the surface is building a paver installation that looks like it drains but does not. The water moves off the top but collects underneath. The saturated base loses its load-bearing capacity. The pavers settle. And the homeowner, who sees a surface that appeared to drain properly, cannot understand why the installation is failing.
How to tell if paver installation was done right begins with a simple test after the first heavy rain. Walk the entire surface. If water is pooling anywhere, if there are wet spots that take hours to dry, if the edges are damp while the center is dry or vice versa, the drainage grade is not performing. And if the drainage grade is not performing in year one, it will only get worse.
Discover how engineered outdoor solutions work together at NextGen Screens
Edge Restraints, Polymeric Sand, and the Details That Separate Decades from Years
There are two details in every paver installation that homeowners almost never ask about and that low-cost contractors almost always cut. The first is edge restraint. The second is polymeric sand. Together, they account for perhaps five percent of the total project cost. And together, their absence accounts for the majority of paver installation problems that surface in the first two to three years.
Edge restraints are structural borders, typically aluminum, plastic, or concrete, installed along the perimeter of the paver field and anchored to the base with spikes driven through the restraint and into the compacted gravel. Their function is to prevent lateral movement of the pavers at the edges of the installation. Without edge restraints, the pavers along the perimeter are free to shift outward over time, which opens joints, disrupts the interlock pattern, and creates gaps that allow sand washout, weed infiltration, and further structural loosening.
Polymeric sand is a jointing compound applied between the pavers and activated with water to create a firm, flexible joint that resists weed growth, insect infiltration, and rain washout. Standard joint sand, by contrast, is loose granular material that washes out with the first heavy rain and must be replenished seasonally. The contractor who uses standard sand instead of polymeric sand saves a few hundred dollars. The homeowner who lives with standard sand spends every spring re-sanding joints and pulling weeds from gaps that should never have been open.
How long do pavers last? With proper base depth, correct drainage grade, quality edge restraints, and polymeric sand, the answer is twenty-five years or more with minimal maintenance. Without those elements, the answer is three to five years before visible deterioration begins to require attention and investment.
The details that separate decades from years are not expensive. They are just easy to skip.
See the complete outdoor living protection options at Onetrack Screens
The Contractor Conversation You Need to Have Before Signing
The most important conversation in the paver installation process is not the one about color, pattern, or design. It is the one about what happens beneath the surface. And it is a conversation that the homeowner must initiate, because the contractor who cuts corners will never raise these topics voluntarily.
Ask about base depth. The answer should be specific; six inches minimum for a patio, eight to twelve for a driveway. If the answer is vague, move on. Ask about compaction. The answer should include plate compaction in lifts, not a single pass over the full depth. If the contractor does not own or rent a plate compactor, that is a disqualifying signal. Ask about drainage grade. The answer should include a specific slope percentage and a drainage direction. If the answer is "water runs off naturally," the contractor does not understand grading.
Ask about edge restraints. The answer should specify the material and the anchoring method. If the answer is "we use the existing border" or "we just set the edge pavers in concrete," the contractor is improvising. Ask about joint sand. The answer should be polymeric, not standard. If the contractor hesitates on this question, they are planning to use standard sand and hoping you do not know the difference.
These are not aggressive questions. They are basic competency questions. The contractor who answers them confidently, specifically, and without defensiveness is the contractor who understands that the invisible work beneath the surface is what makes the visible surface last. The contractor who deflects, generalizes, or becomes uncomfortable is telling you exactly how they plan to build your patio.
Paver settling fix projects are almost always more expensive than doing the job correctly in the first place. The base must be re-excavated, the pavers must be removed and relaid, and the grading must be corrected from the subgrade up. The homeowner pays twice; once for the original installation and once for the repair. The informed homeowner pays once, because they asked the right questions before signing.
Explore the full resource library at NextGen Screens
Building a Surface That Deserves What Sits on Top of It
The paver installation is not the end of the outdoor living story. It is the beginning. The surface you are building today is the floor of the outdoor room you will continue to build tomorrow and the season after that and the year after that. The pergola posts will anchor to it. The motorized screen tracks will reference its grade. The outdoor furniture will sit on its surface. The fire pit will rest on its base. Every element of the outdoor living space that makes your backyard worth spending time in depends on the integrity of the surface beneath it.
A paver installation that was done right is invisible in the best possible way. You do not think about it. You do not notice it. You walk on it, you set furniture on it, you host on it, and it simply works, season after season, year after year. A paver installation that was done wrong is impossible to ignore. The settling, the pooling, the shifting, the weeds; each one is a daily reminder that the foundation was not given the attention it deserved.
The surface your outdoor room stands on should be as thoughtfully engineered as the structure above it. The contractor who understands this builds a surface that lasts. The contractor who does not builds a surface that photographs well and deteriorates quietly.
If you are ready to explore what a properly engineered paver installation looks like for your property, or if you want to understand how the surface beneath your feet connects to the pergola, the screens, and the complete outdoor living system above it, the resources are waiting.
Start exploring the complete outdoor living ecosystem at NextGen Screens
Discover Onetrack's motorized screen systems at Onetrack Screens
Learn about hurricane-rated protection with Maxforce Screens
COMPANY
OUR PRODUCTS
SERVICE AREAS
SUPPORT
Copyright 2026. Titan Outdoor Solution.All Rights Reserved.